iPhone実機を接続して、Android StudioでFlutterアプリをビルドしたらエラーになったので、その解消方法を記録しておきます。
iPhone実機でビルド
MacBookに有線(USB Type-C – Lightning)でiPhone実機を接続し、Android Studioで端末を選択してビルドします。

すると、次のエラーが発生しました。
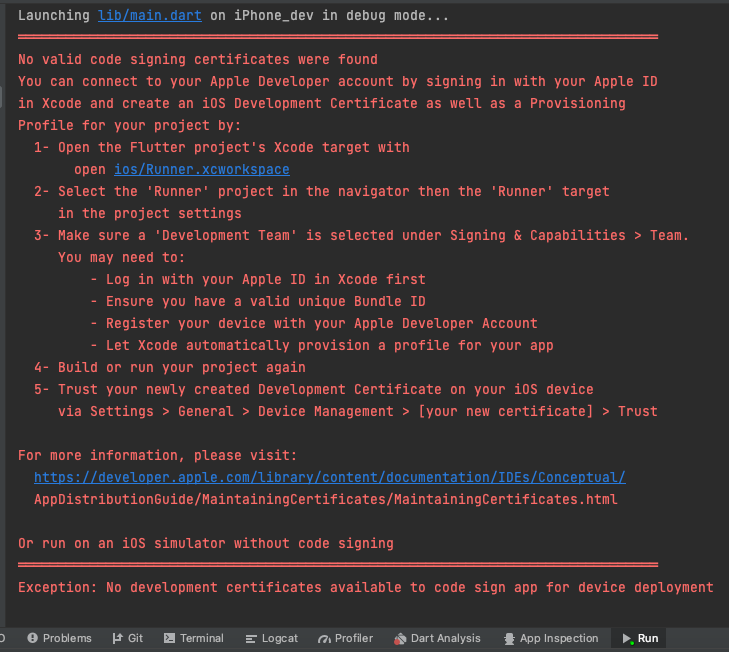
テキストも貼り付けておきます。
Launching lib/main.dart on iPhone_dev in debug mode...
════════════════════════════════════════════════════════════════════════════════
No valid code signing certificates were found
You can connect to your Apple Developer account by signing in with your Apple ID
in Xcode and create an iOS Development Certificate as well as a Provisioning
Profile for your project by:
  1- Open the Flutter project's Xcode target with
       open ios/Runner.xcworkspace
  2- Select the 'Runner' project in the navigator then the 'Runner' target
     in the project settings
  3- Make sure a 'Development Team' is selected under Signing & Capabilities > Team.
     You may need to:
         - Log in with your Apple ID in Xcode first
         - Ensure you have a valid unique Bundle ID
         - Register your device with your Apple Developer Account
         - Let Xcode automatically provision a profile for your app
  4- Build or run your project again
  5- Trust your newly created Development Certificate on your iOS device
     via Settings > General > Device Management > [your new certificate] > Trust

For more information, please visit:
  https://developer.apple.com/library/content/documentation/IDEs/Conceptual/
  AppDistributionGuide/MaintainingCertificates/MaintainingCertificates.html

Or run on an iOS simulator without code signing
════════════════════════════════════════════════════════════════════════════════
Exception: No development certificates available to code sign app for device deployment
このエラーを解消していきます。
iPhone実機ビルドのエラー解消手順
エラーに記載されている手順通り進めていきます。
1- Open the Flutter project's Xcode target with open ios/Runner.xcworkspace
まずは、FlutterプロジェクトをXcodeで開きます。上記の青字部分をクリックすると、自動で開きました。
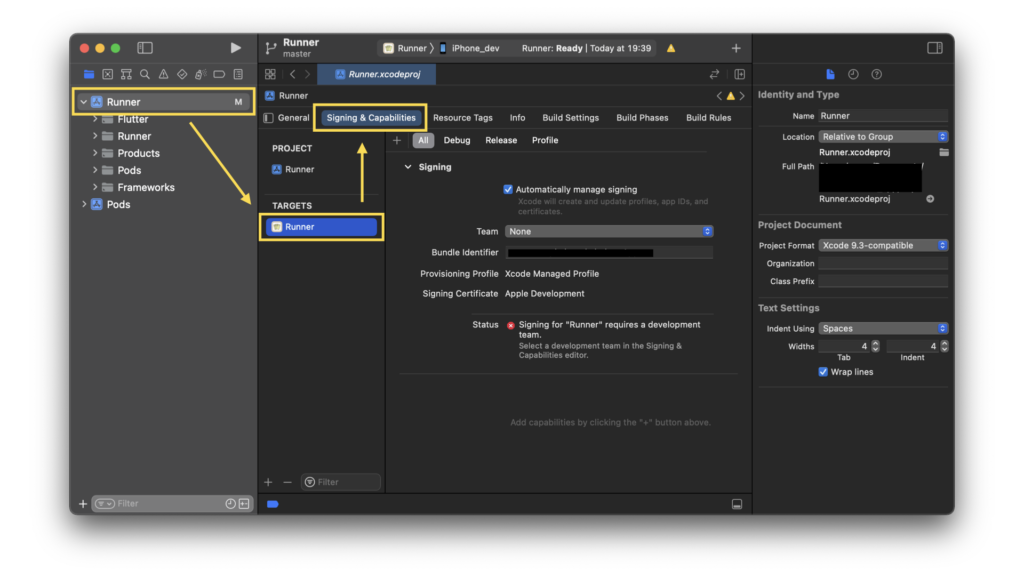
2- Select the 'Runner' project in the navigator then the 'Runner' target in the project settings
次に、Xcodeで「Runner」プロジェクトを開き、TARGETSの「Runner」を選択します。
上段の項目で「Signing & Capabilities」を選択します。
You may need to:
     - Log in with your Apple ID in Xcode first
     - Ensure you have a valid unique Bundle ID
     - Register your device with your Apple Developer Account
     - Let Xcode automatically provision a profile for your app
(訳)
次のことが必要になる場合があります。
     - 最初にXcodeでAppleIDを使用してログインします
     - 有効な一意のバンドルIDがあることを確認してください
     - デバイスをAppleDeveloperアカウントに登録します
     - Xcodeにアプリのプロファイルを自動的にプロビジョニングさせます
Xcode上で秘密鍵を作成し、キーチェーンアクセスで鍵の設定を行います。(詳細は省略します)
上記の設定が終わったのち、再びXcodeの画面に戻ります。
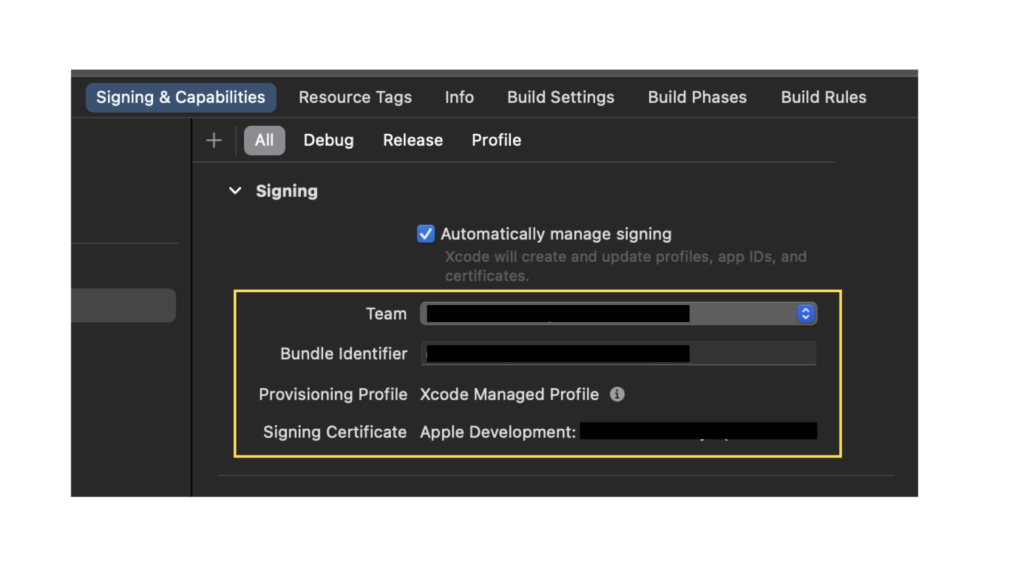
「Team」の項目のプルダウンから作成済みのチーム名を選択します。作成していない場合は、「Add an account…」から作成します。
「Bundle Identifier」に、一意のバンドルIDが入力されていることを確認します。
すると、下図のように設定が完了します。
4- Build or run your project again
プロジェクトをビルドします。(初回は特に時間がかかるので、しばらく待ちます。)
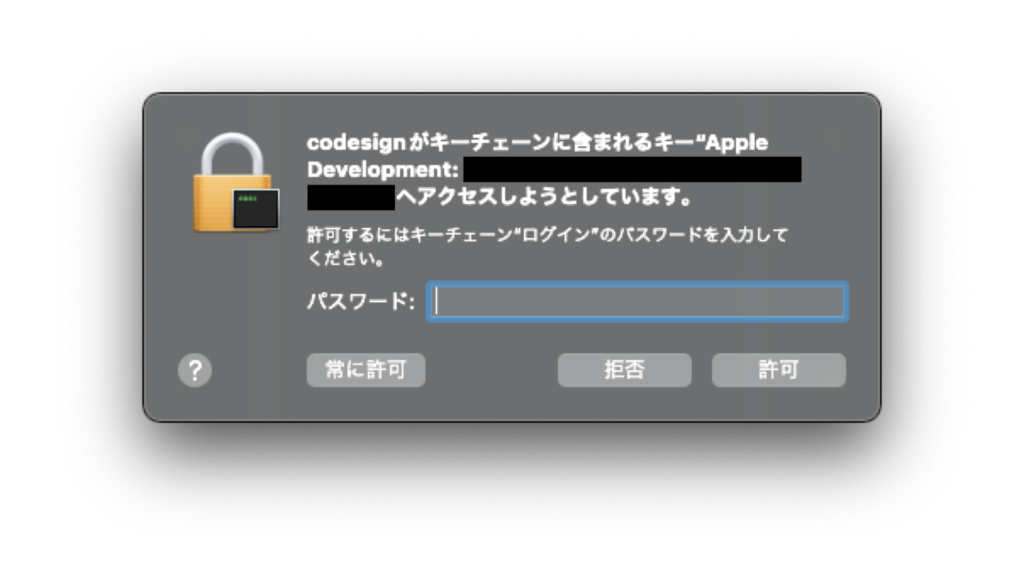
数分後、キーチェーンアクセス許可が求められるので、パスワードを入力して「許可」します。
さらに数分後、「デバイスの検索および接続を求められています」ダイアログが、ビルド中の実機で表示されるので「OK」をタップ。
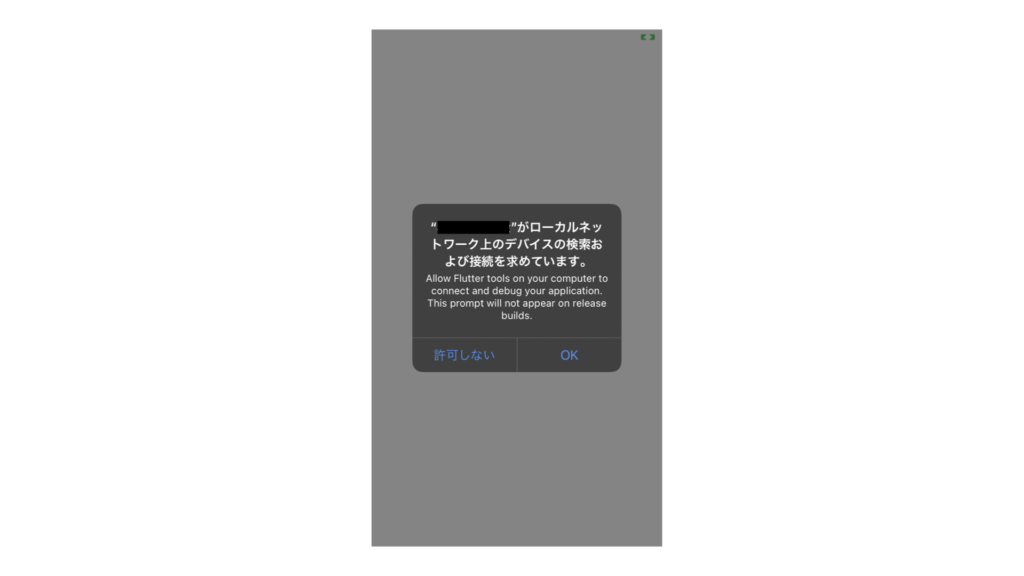
そのままビルドは継続するので、しばらく待ちます。
すると、無事、ビルドが完了しました。
誰かの助けになれば幸いです。

